The previous post covered the 5 materials that are commonly used to render geometries, but there's one more that's well worth knowing - meshShaderMaterial.
To understand meshShaderMaterial it's important to know what the "shader" part refers to. A shader is a short program that comes in 3 parts.
- The vertex shader - this part tells the GPU how the position on the surface of the geometry maps to the material that's being generated.
- The fragment shader - this part takes the position from the vertex shader and returns a color value. The fragment shader runs for each point in the space.
- The shader uniforms - Uniforms are like variables that can be updated from outside of the shader. It's common to pass in things like a clock value to animate what the shader generates over time.
Shaders are not written in JavaScript. They use a language called GLSL, which stands for "OpenGL Shading Language". It's a lot closer to the C programming language than JavaScript.
This post is not about GLSL. The basics will be covered, but it's a deep subject and far more complicated than I could even begin to get in to here. The focus is about using a shader material in react-three-fiber. If you want to know more about GLSL there are some links at the end.
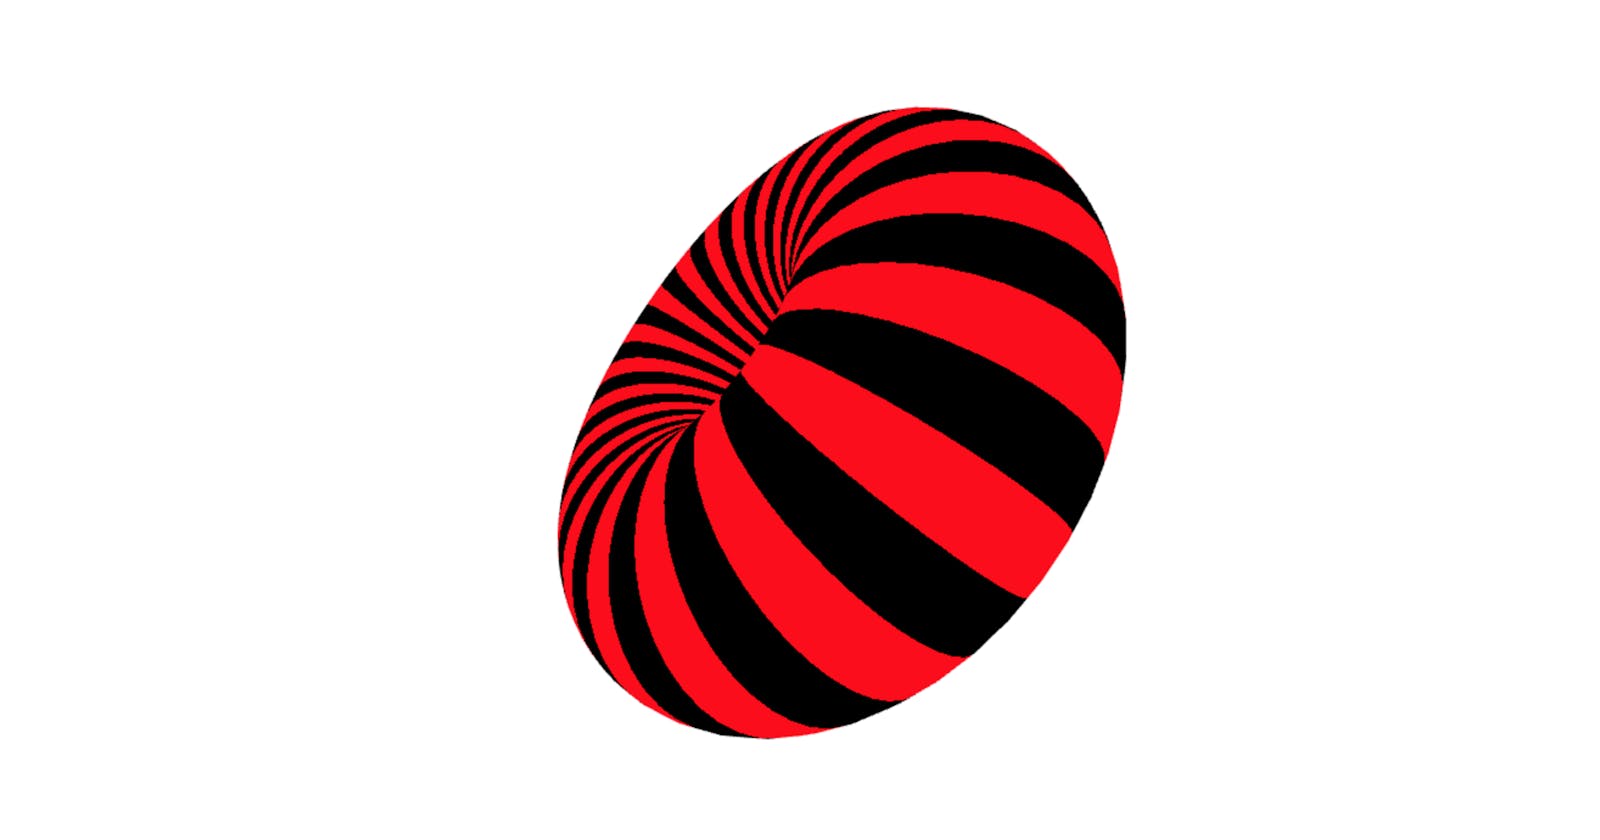
At this point it's probably worthwhile showing what the end goal is.
If it's working correctly there should be a torus ring geometry on the screen with an animated black and red stripey material applied to it. react-three-fiber is being used to draw a mesh with a torusGeometry shape and shaderMaterial material attached.
const Torus = (props) => {
  const torusRef = useRef();

  useFrame(({ clock }) => {
    torusRef.current.material.uniforms.u_time.value = clock.oldTime * 0.0001;
  });

  return (
    <mesh ref={torusRef} {...props}>
      <torusGeometry args={[1.8, 1.2, 48, 64]} />
      <shaderMaterial attach="material" args={[KnotShaderMaterial]} />
    </mesh>
  );
};
This isn't very different to the geometry and material examples in previous posts. The useFrame loop is being used to update a uniform, u_time, that's part of the material. This is set to a value based on the clock that useFrame provides. useFrame updates that 60 times a second, which updates the material and produces the nice animated material effect.
The shader in shaderMaterial
The KnotShaderMaterial value that's passed to the material in its args prop is where the GLSL code is defined.
const KnotShaderMaterial = {
  uniforms: {
    u_time: { type: "f", value: 0 }
  },
  vertexShader: `
    precision mediump float;
    varying vec2 vUv;
    void main() {
        vec4 mvPosition = modelViewMatrix * vec4(position, 1.);
        gl_Position = projectionMatrix * mvPosition;
        vUv = uv;
    }
  `,
  fragmentShader: `
    varying vec2 vUv;
    uniform float u_time;

    void main() {
      vec2 uv = vUv;
      float cb = floor((uv.x + u_time) * 40.);
      gl_FragColor = vec4(mod(cb, 2.0),0.,0.,1.);
    }
  `
};
There are three properties in the KnotShaderMaterial object - uniforms, vertexShader and fragmentShader. The uniforms object is attached to the material so that we can update it using a ref in the React code. The type of u_time, "f", means that it takes a float. It's worth noting that GLSL is strongly typed - it will throw an error if a uniform is set to a value of the wrong type. GLSL has a large number of types that don't appear in JavaScript (or TypeScript) that graphics programming often requires.
The vertexShader in this example is a straightforward map from the camera position and model matrix (position, rotation and scaling) to a normalized space (eg from 0 to 1). This is the key to writing shaders. In the fragmentShader section every point in the space is passed to the main() function, starting with [0,0] and finishing with [x,y] where x and y are the extents of the gl_Position coordinates. For every point a color should be returned.
In the main() function of the fragmentShader the coordinates are being converted to either a black or a red color based on the value of cb, which is a mathematical transformation of one dimension of the gl_Position; floor((uv.x + u_time) * 40.) takes the x coordinate (which ranges from 0 to 1) and distributes 40 alternating values across it that are either 0 or 1. This results in a stripey effect.
The fragmentShader sets gl_FragColor to a four dimensional vector (r,g,b,a) that's either [0,0,0,1] if cb is 0, or [1,0,0,1] if cb is 1. This results in the black and red effect.
Why use a shader?
One thing to note about shaders is that they're really, really fast. On a modern graphics card with lots of cores hundreds of thousands of points are calculated every millisecond. This is the key to generating a solid 60FPS WebGL scene. Once the shader program is loaded on the GPU and it doesn't change (apart from updating its uniforms) the graphics card can pump out the material without slowing the JavaScript code down at all. There is no practical way to make a fast, complex WebGL scene with animated materials without leveraging shaders.
